
How to Set Up a Small Home Design Studio on a Budget
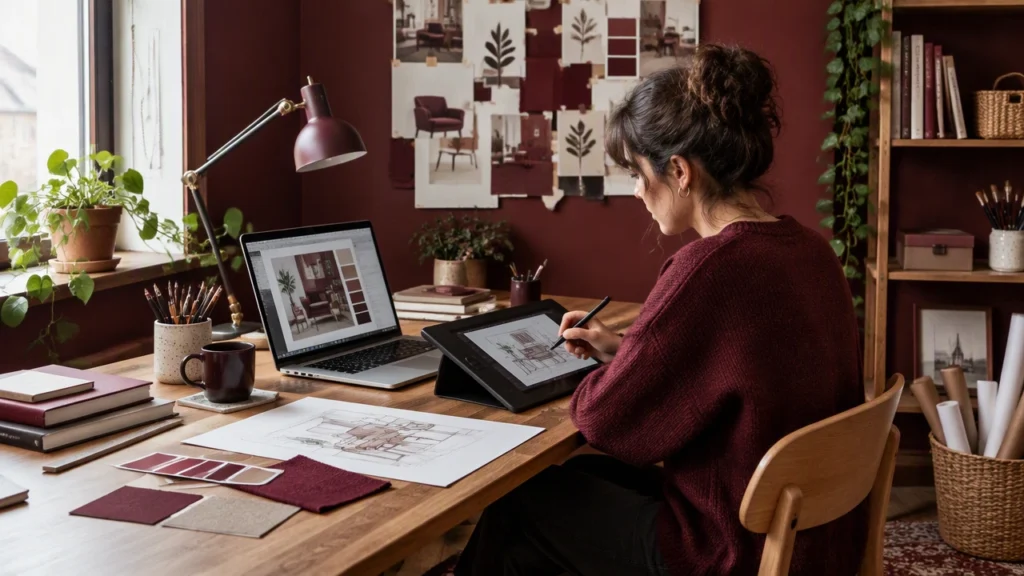
Learning creative skills does not require a large room or an expensive fit-out. A useful home studio is simply a place where ideas can move smoothly between paper, tools, materials, and screens. The goal is to create a compact environment that supports focused work, protects your materials, and makes starting easier. This guide explains how to set up a small home design studio on a budget while keeping the space flexible enough for both manual and digital projects.
Start with the work you actually do
Before buying furniture, observe your routine. Do you sketch, cut, paint, sew, build prototypes, edit images, write, or combine several of these activities? Note which tasks happen daily and which are occasional. Daily activities should shape the main layout; occasional activities can be stored away.
Divide the work into two broad zones: a physical zone for hands-on making and a digital zone for screen-based work. In a small studio, these zones can overlap, but they should still feel distinct. A desk used for cutting and gluing should not become the only place for a laptop. Separate surfaces reduce cleanup, protect equipment, and help your mind switch between modes.
Choose a layout that supports movement
Place the primary work surface where daylight is available but not directly reflective on a screen. A window beside the desk usually works better than a window behind it. Keep a clear path to storage so you can retrieve tools without climbing over boxes.
A practical arrangement includes:
- A main table or desk large enough for your current project, with space to rest both hands and materials.
- A secondary surface for cutting, assembly, drying, or a second person.
- A vertical storage wall using shelves, pegboard, hooks, or a rail system.
- A floor clearance for larger pieces, temporary layouts, or stretching during long sessions.
If the room is very small, consider a folding leaf, a wall-mounted drop-leaf table, or a compact desk that can be cleared completely. Mobility matters: lockable casters allow a worktable to become a cutting station, then move aside for digital work.
Buy the essentials first
Budget spending in layers. Begin with the items that improve comfort, safety, and repeatability rather than decorative accessories.
Furniture and ergonomics
Use a chair that supports your back and allows your feet to rest flat. Adjustable height is useful when switching between seated screen work and standing craft tasks. If a new chair is not affordable, improve an existing one with a cushion or lumbar support, and check that the seat height suits the desk.
Your work surface should be stable, easy to clean, and resistant to the tasks you perform most. A plain tabletop can be protected with a cutting mat, removable sheet, or washable cover. Avoid buying a very large desk before measuring the room; a slightly smaller surface with good storage often works better.
Lighting
Combine general room light with a focused task lamp. A daylight-balanced bulb near the physical work zone helps you judge color and detail. Position the lamp opposite your writing hand to reduce shadows. For screen work, keep overall brightness balanced so the monitor is not surrounded by darkness.
Tools and technology
Start with a short, dependable toolkit: a metal ruler, a self-healing cutting mat, a craft knife with replacement blades, a pencil, eraser, adhesive, scissors, a small square, and containers for loose parts. Add specialist tools only when a project requires them repeatedly.
For digital work, prioritize a reliable computer, enough memory, a stable keyboard and mouse, and a monitor at a comfortable viewing height. A simple stand made from sturdy books can raise a laptop to eye level. Test second-hand equipment carefully before buying, and check warranty, battery condition, ports, and screen quality.
Create storage that stays visible
Hidden storage is useful, but invisible storage can slow you down. Keep active materials within easy reach and archive the rest. Clear containers, labeled drawers, and open trays let you see supplies without emptying the room.
Use vertical space above the desk and on unused wall areas. Pegboard works well for tools with regular shapes; shallow shelves suit paints, paper, and small machines. Store heavy items low and light items high. Assign one container to each project so components do not migrate across the studio.
Make a habit of returning tools to a marked place after each session. A five-minute reset at the end of the day prevents clutter from becoming a barrier to starting the next project.
Control dust, noise, and mess
Manual work often creates dust, trimmings, and residue. Keep a small vacuum, brush, cloths, and a lidded waste bin near the physical zone. Cover porous surfaces and ventilate the room when using adhesives, sprays, or finishes. Store chemicals safely and away from food or shared household areas.
For noise, use headphones for concentration and choose quieter tools when possible. If the studio shares space with bedrooms or living areas, schedule louder tasks for suitable times and place a mat under equipment that vibrates.
Build a flexible digital workflow
Keep cables organized with clips or a tray so they do not cross cutting areas. Label chargers and adapters, and reserve one power strip for the digital zone. Save files in a clear folder structure with dated project folders and regular backups. A simple naming system prevents duplicate versions and makes collaboration easier.
Digitize sketches with a phone camera or an affordable scanner when needed. Photograph physical work under consistent light, then store the images with notes about materials and dimensions. This creates a searchable record without requiring an elaborate archive.
Spend gradually and test the space
Use the studio for two or three weeks before making major purchases. Notice where you hesitate, what remains on the floor, and which tools are constantly retrieved. Improve one bottleneck at a time. Borrow equipment, buy used furniture, or choose modular pieces that can be repurposed as your practice changes.
An efficient studio is not the one with the most gear. It is the one that makes the next step obvious: pick up a tool, open a file, make a mark, and continue. With careful planning, modest lighting, useful storage, and a layout shaped by your real work, a small home studio can support serious creative practice without straining your budget.